Getting Started
Introduction
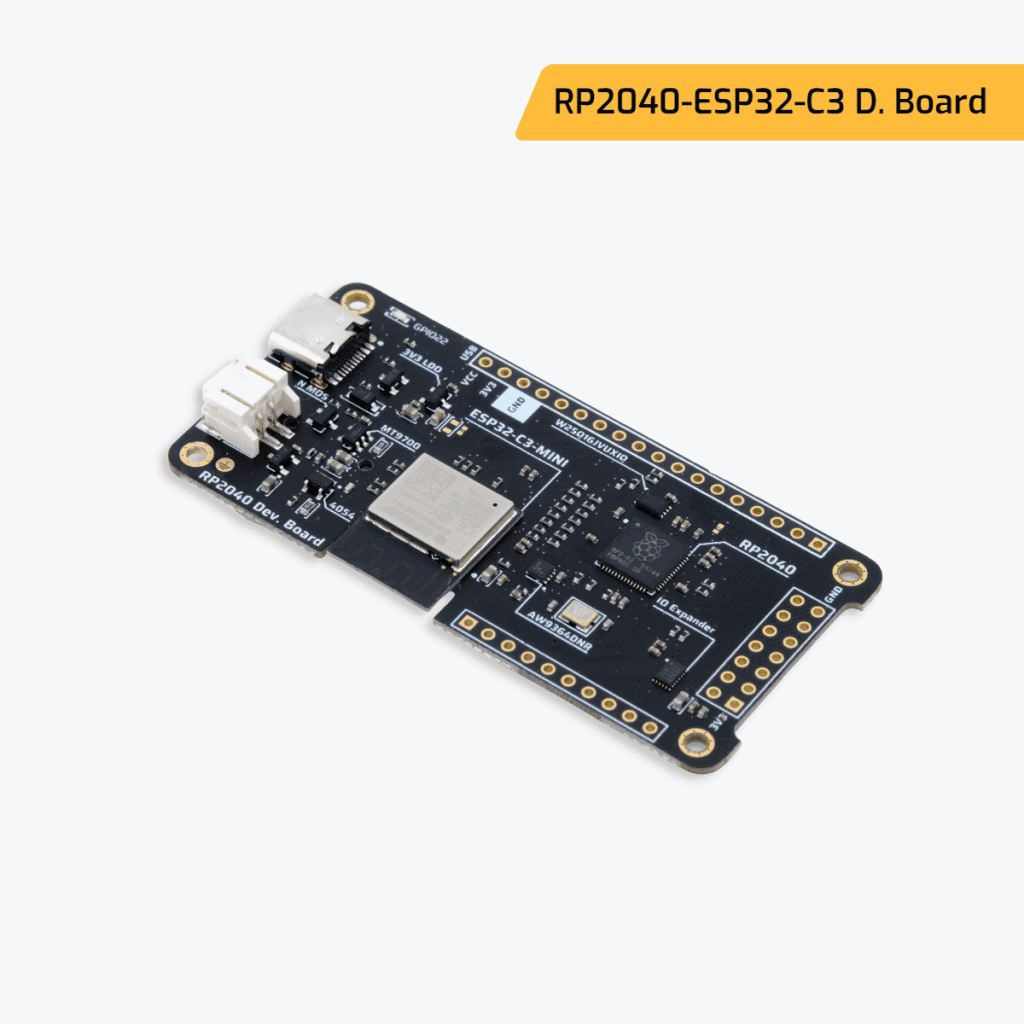
With the RP2040 - ESP32C3 Development Board, you can take your electronic projects to the next level. Featuring the high-performance RP2040 Dual ARM Cortex-M0+ processor running at a clock speed of 133MHz, which is developed by Raspberry Pi, this board offers exceptional processing power. Additionally, this board comes with a range of peripherals that make it easy to set up and use in a variety of projects, making it a versatile and powerful tool for electronics enthusiasts and professionals alike.
Hardware
Overview
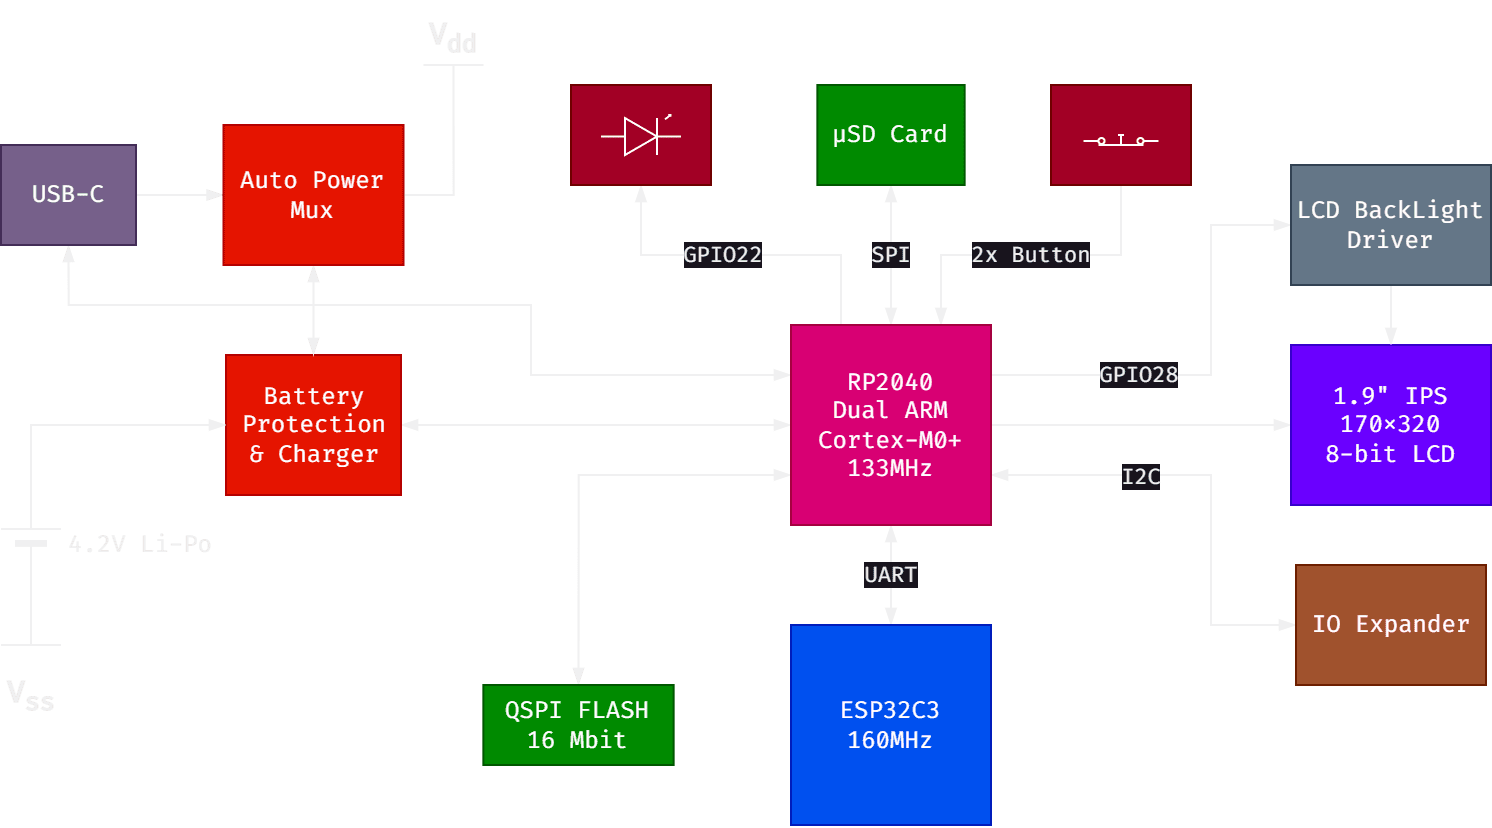
The RP2040 - ESP32C3 Development Board is not just limited to the powerful RP2040 processor, but also includes the ESP32-C3 Module, which adds support for WiFi and Bluetooth Low Energy (BLE) connectivity. This integration allows for seamless wireless communication with other devices and networks, making it an ideal choice for IoT applications that require wireless connectivity.
The board also comes with a 1.90” LCD 8-bit Parallel LCD Connector, on-board Flash Boot Memory, and a µSD card connector. One of its unique features is a GPIO expander in the form of the SLG46826 GreenPAK™ Programmable Mixed-signal Matrix with In-System Programmability. Additionally, the board has a USB-C connector with bootloader support, a battery connector with protection and charging, and our current sensor "SmartShunt-Pico24".
The RP2040 - ESP32C3 Development Board is meticulously designed with safety and hardware design best practices in mind, and is built using Altium® as 4 Layers. This ensures that the board is not only robust and reliable, but also versatile enough to meet the needs of a wide range of projects. Whether you are a professional developer or an electronics enthusiast, this board is an ideal choice for those looking for a top-quality development board that delivers exceptional performance and reliability.
Key Features
ESP32-C3 Module for WiFi and BLE connection
The ESP32-C3 Module is a compact and powerful wireless module that enables WiFi and Bluetooth Low Energy (BLE) connectivity. It is designed for use in a wide range of applications, including home automation, IoT devices, wearables, and more. With its low power consumption and high data throughput capabilities, the ESP32-C3 Module is an ideal solution for developers looking to add wireless connectivity to their projects.
1.90” LCD 8-bit Parallel LCD Connector
The 1.90" LCD 8-bit Parallel LCD Connector is a display interface that enables high-quality video output for various applications. This connector supports a wide range of displays and provides reliable and fast communication with the processor. It is commonly used in applications where visual feedback is required. For instance, it can be used in a temperature controller to show temperature readings and setpoints.
You can find the compatible part from the link below:
https://alpelectronix.com/product/tft-displays/lcd-19170320-st7789v2/
GPIO Expander - SLG46826 GreenPAK™ Programmable Mixed-signal Matrix with In-System Programmability
The GPIO Expander - SLG46826 GreenPAK™ is a versatile device that provides developers with the ability to expand the number of general-purpose input/output (GPIO) pins and add custom logic functionality to a design. With its programmable mixed-signal matrix and in-system programmability, the GreenPAK™ can be used in a variety of applications such as sensor interfacing, motor control, and LED lighting. Overall, the GPIO Expander - SLG46826 GreenPAK™ is an ideal solution for developers looking to add custom functionality to their designs while minimizing hardware changes.
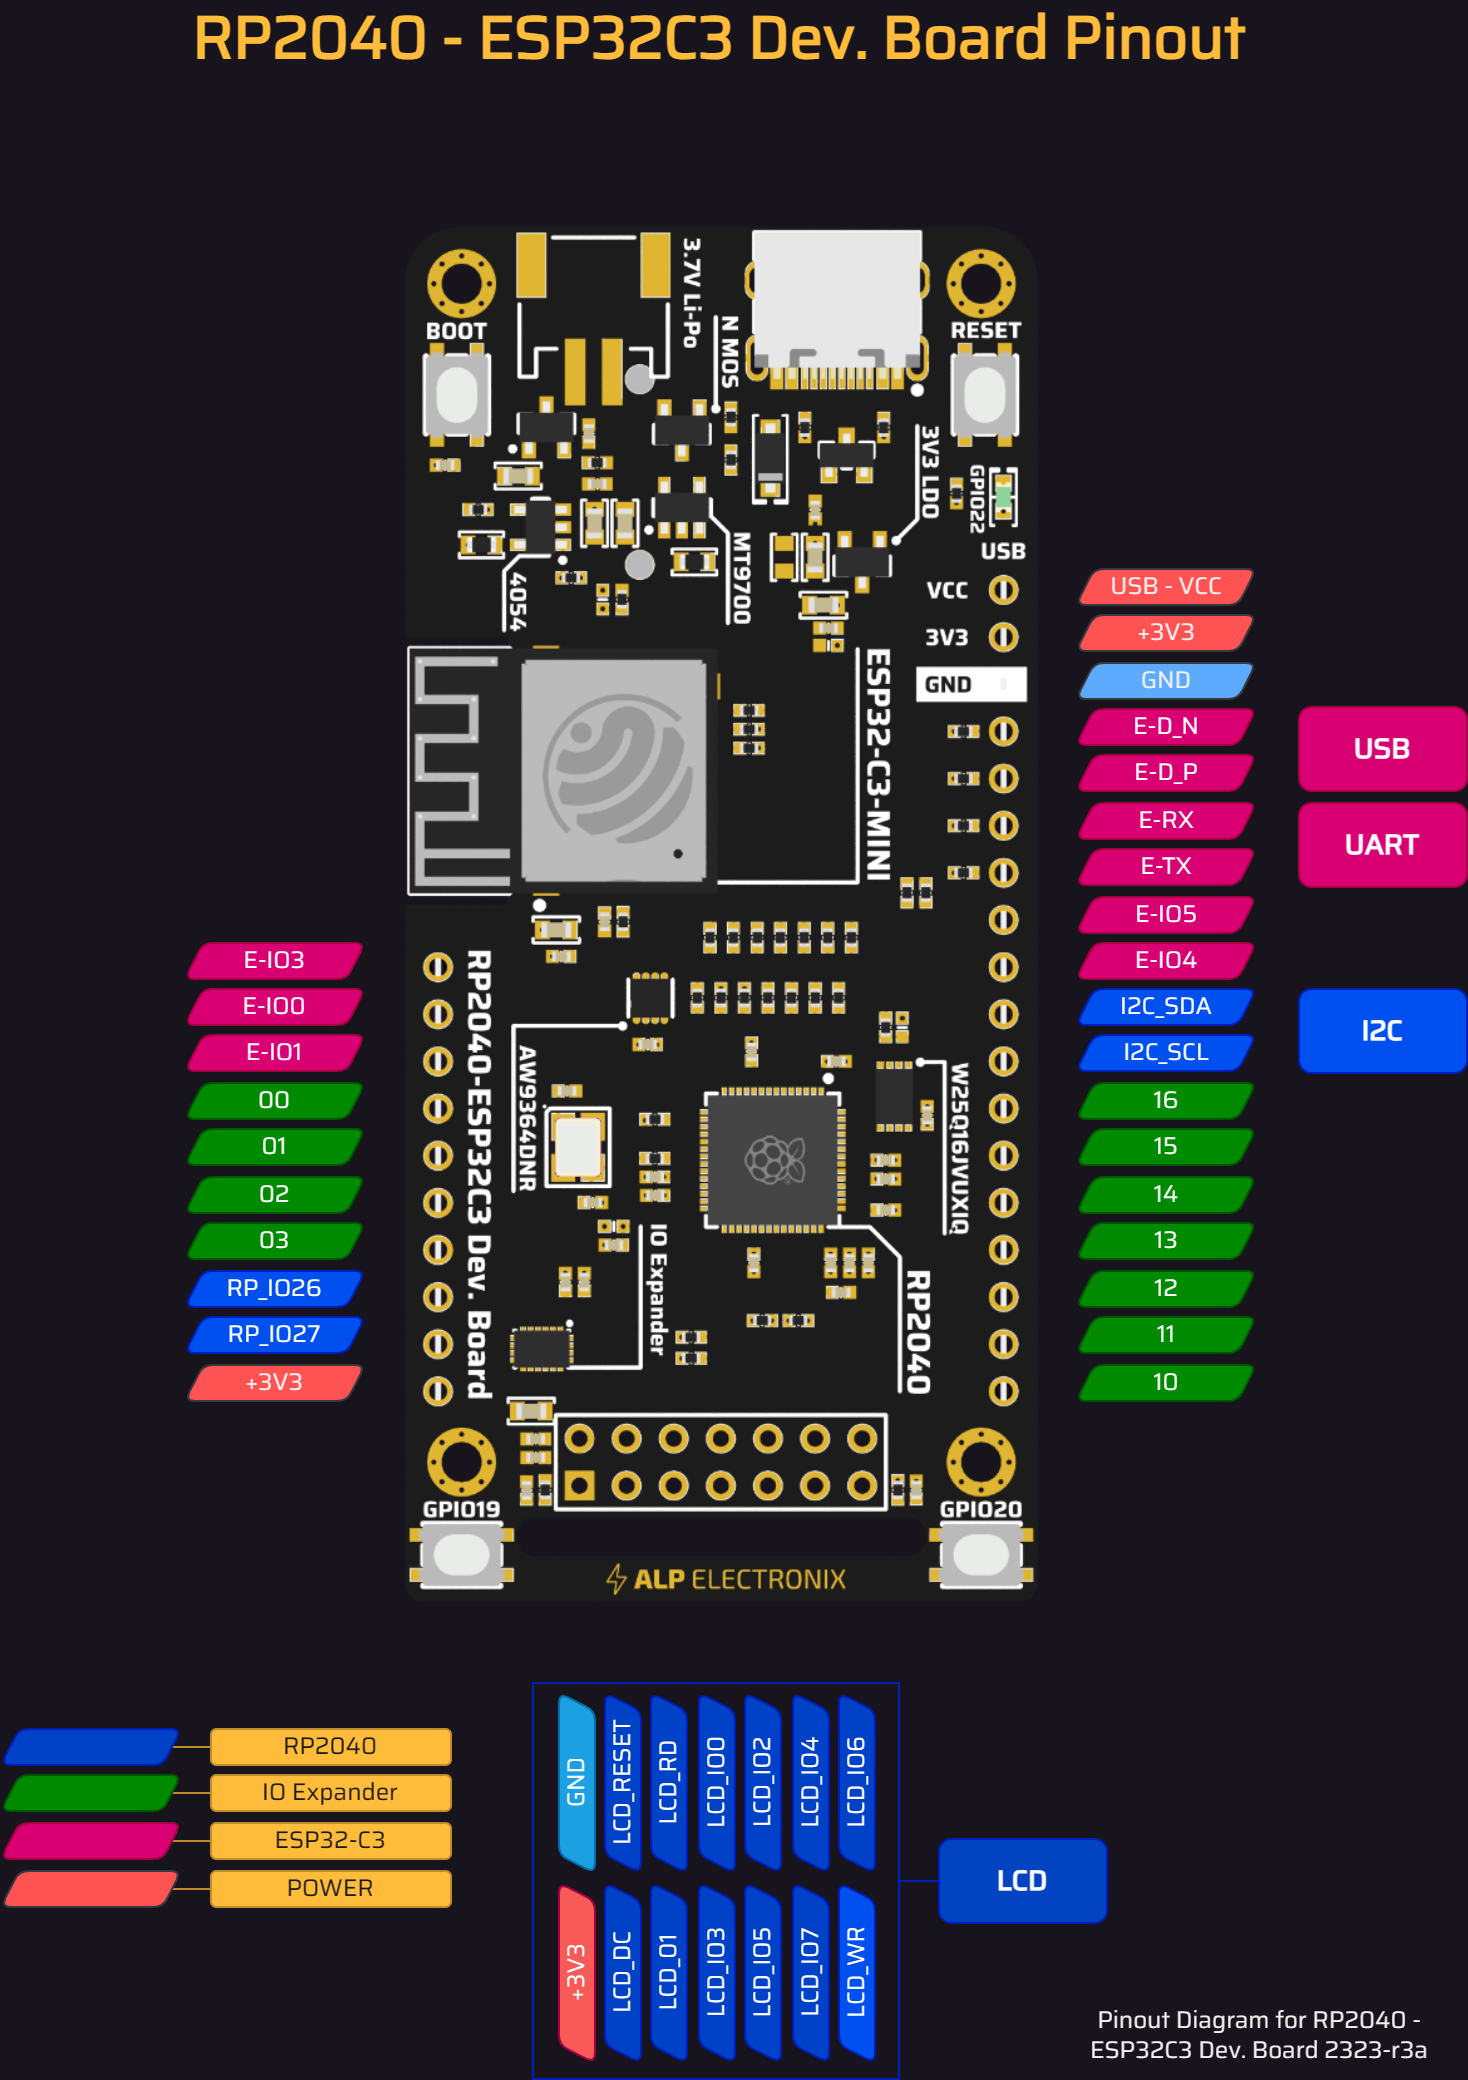
Pinout
Software
Pico Setup for Windows
Please download and install the most recent version of the Pico SDK from the provided link. Follow the instructions to complete the installation of the latest release.
https://github.com/raspberrypi/pico-setup-windows
Additional Raspberry Pi Pico as a Debugger(Optional)
With the help of the picoprobe firmware, a single Raspberry Pi Pico can serve as a means to reprogram and debug another one. If you have an extra Pico and want to use it for this purpose, just follow the instructions below:
Download the PicoProbe.uf2 file form the link:
To set your Raspberry Pico to Mass Storage mode, hold down the BOOTSEL button while plugging it in. This action will cause it to appear as a drive on your computer. Simply drag and drop the downloaded UF2 file onto the drive.
Now you can use your additional Raspberry Pi Pico as a debugger and connect to your RP2040 - ESP32C3 Development Board.
First Project
Clone Viking Sample Codes Repository
To get started, you'll need to clone the sample code repository to your local machine.
https://github.com/alpelectronix/RP2040-ESP32C3-Development-Board/tree/master/SW/
Insert Viking Sample Codes into Pico Examples
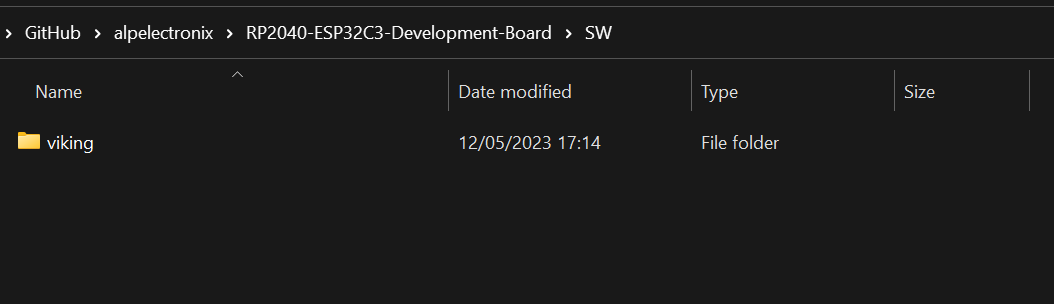
To make the setup process even simpler, we recommend copying and pasting the "viking" folder directly from our repository into your local pico_examples folder. This will allow you to use your existing pico configurations and settings with our sample codes, saving you time and preventing the need for any extra configuration.
First copy the "viking" folder from our repository:
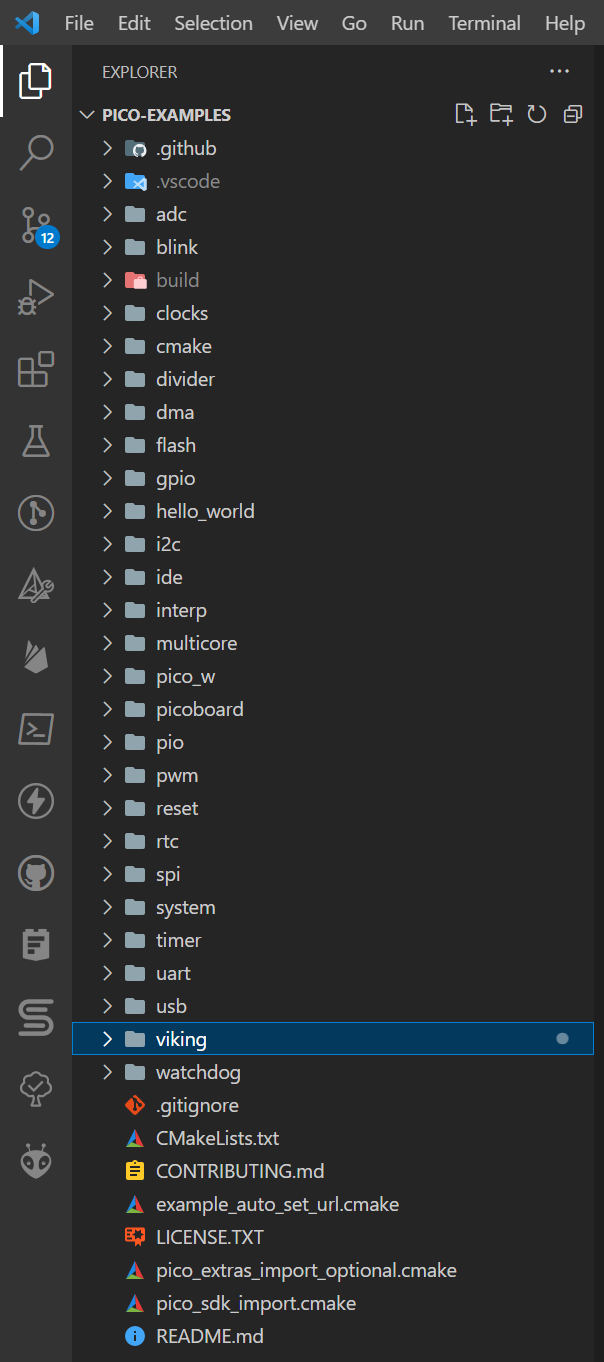
Next, locate the "pico-examples" folder on your computer and paste into it.
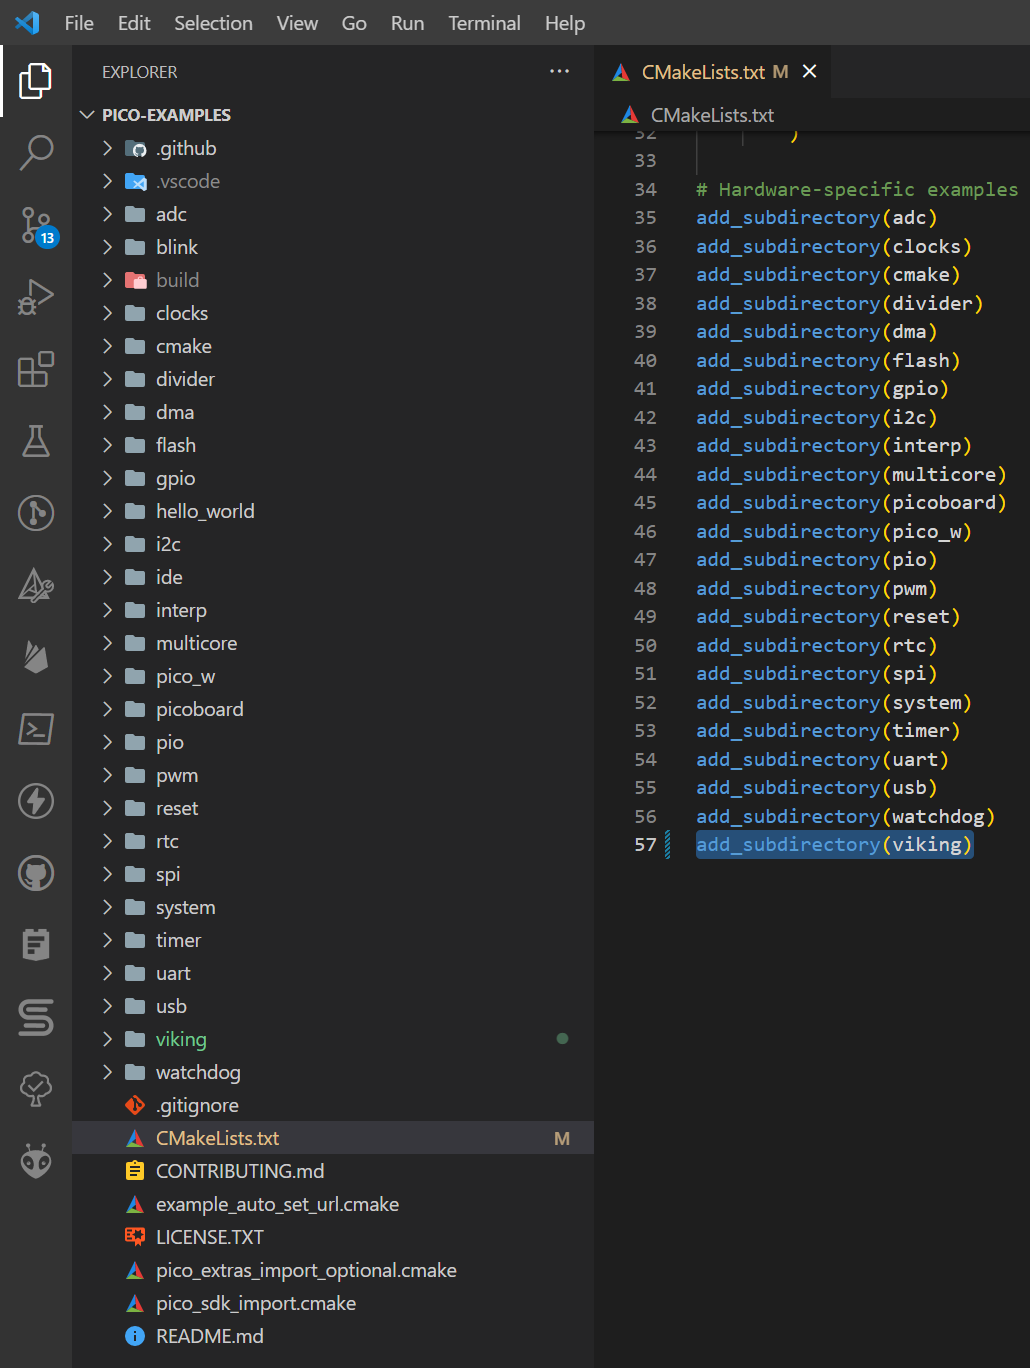
Finally, don't forget to add the new "viking" folder to your CMakeLists.txt file. This is an important step that will ensure your project can find and use the files located in this folder.
Led Blink Example
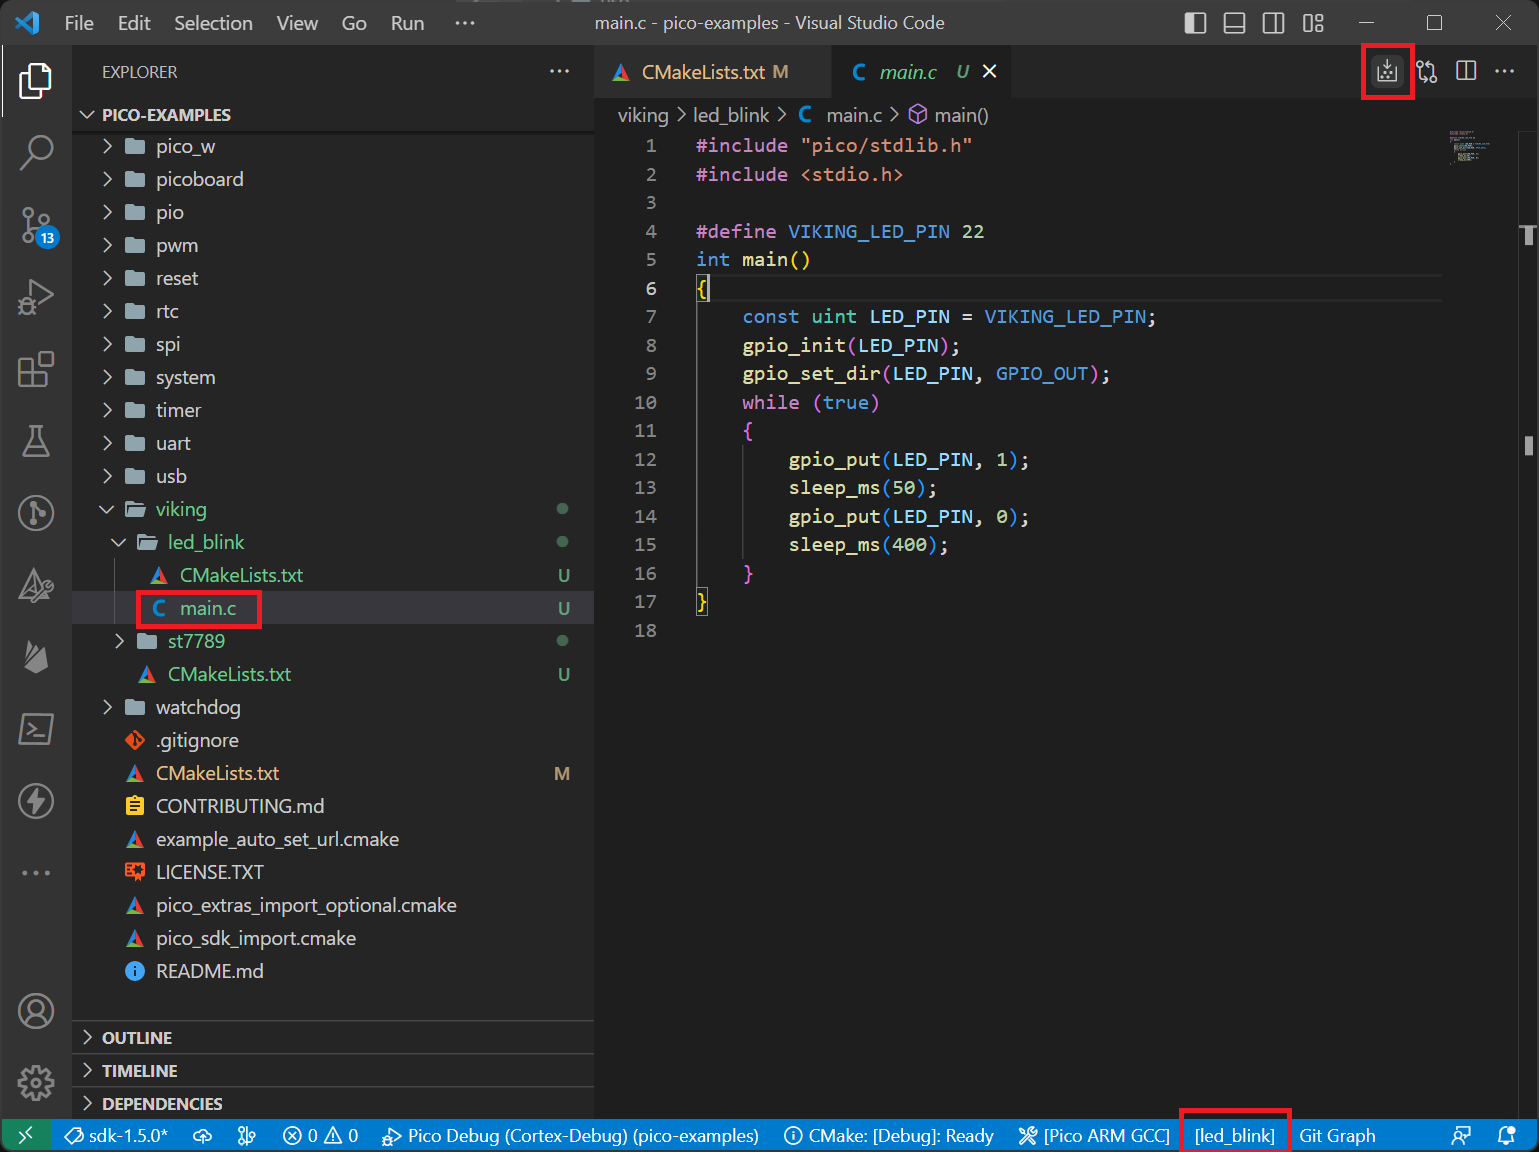
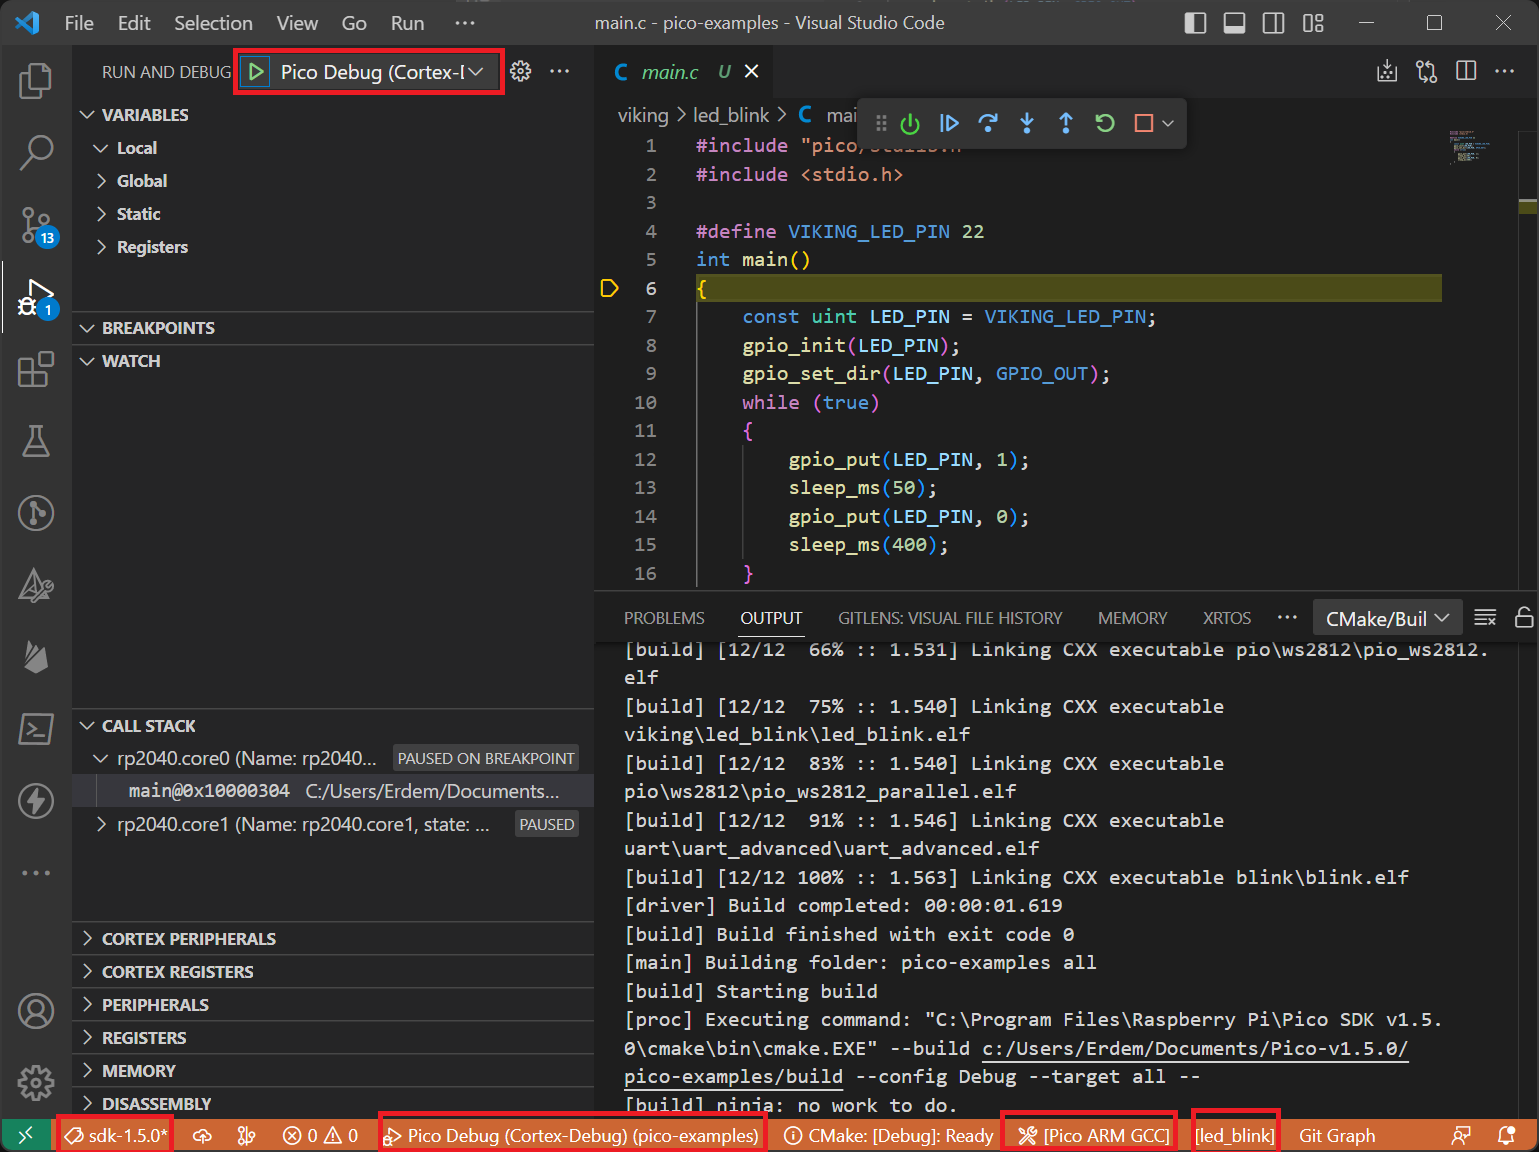
To get started with the led_blink example, open up VS Code and navigate to the main.c file. This is a very basic example that will help you get familiar with the development environment. Once you've located the file, simply click on the build button located in the upper right corner of the screen to build the program.
Flashing & Debugging
To begin testing your program, you'll need to connect the debugger and development board setup to your computer. Once you've done that, you can proceed to operate the program and see how it performs.
Conclusion
In conclusion, the RP2040 - ESP32C3 Development Board is an impressive tool that offers high-performance capabilities and a range of peripherals for use in a variety of electronic projects. With its powerful Dual ARM Cortex-M0+ processor and easy-to-use design, this board is well-suited for both hobbyists and professionals looking to take their projects to the next level. Whether you're looking to experiment with new ideas or build complex systems, the RP2040 - ESP32C3 Development Board provides an excellent foundation for innovation and creativity in the field of electronics.
Support
In the event that you require technical support, you can reach out to us by sending an email to **contact@alpelectronix.com**. Our team is dedicated to providing prompt and effective assistance to help you resolve any technical issues you may encounter while using our products. Don't hesitate to reach out to us if you need assistance or have any questions about our products.